Disclaimer: The information in this article is compiled by evisaflow.com from official publications and open internet sources for informational purposes only, and does not constitute formal travel advice. Travel information (including but not limited to visa regulations, entry policies, fees, and attraction schedules) is subject to change without notice. Please verify all details independently with the relevant official authorities before traveling. evisaflow.com assumes no liability for travel disruptions or losses resulting from reliance on this content.
Guide
Border & Entry
6 min read
How to Fill Out the Indonesia Arrival Card (All Indonesia) with eVisaFlow
Use the eVisaFlow Chrome side panel to fill a single-traveler All Indonesia form, with practical checks for dates, airline codes, hotels and declarations.
TL;DR: Open the official All Indonesia website and the eVisaFlow Chrome side panel, select one saved passport, and enter your trip, accommodation and contact details in the extension. Click Auto Fill on each of the four official form pages, check the results, and use the website's own controls to continue. Pay particular attention to the departure date, the specific airline and hotel selected, and every declaration answer.
This guide uses the eVisaFlow Southeast Asia Chrome extension to fill out the All Indonesia arrival card for one foreign visitor arriving by commercial flight and staying at a hotel. The screenshots show the official site and extension in English, with fictional passport and contact details. Enter your own details when completing the form.
For an overview of what the declaration is and how it differs from a visa, see the All Indonesia arrival declaration guide.
1. Open the website and Chrome side panel
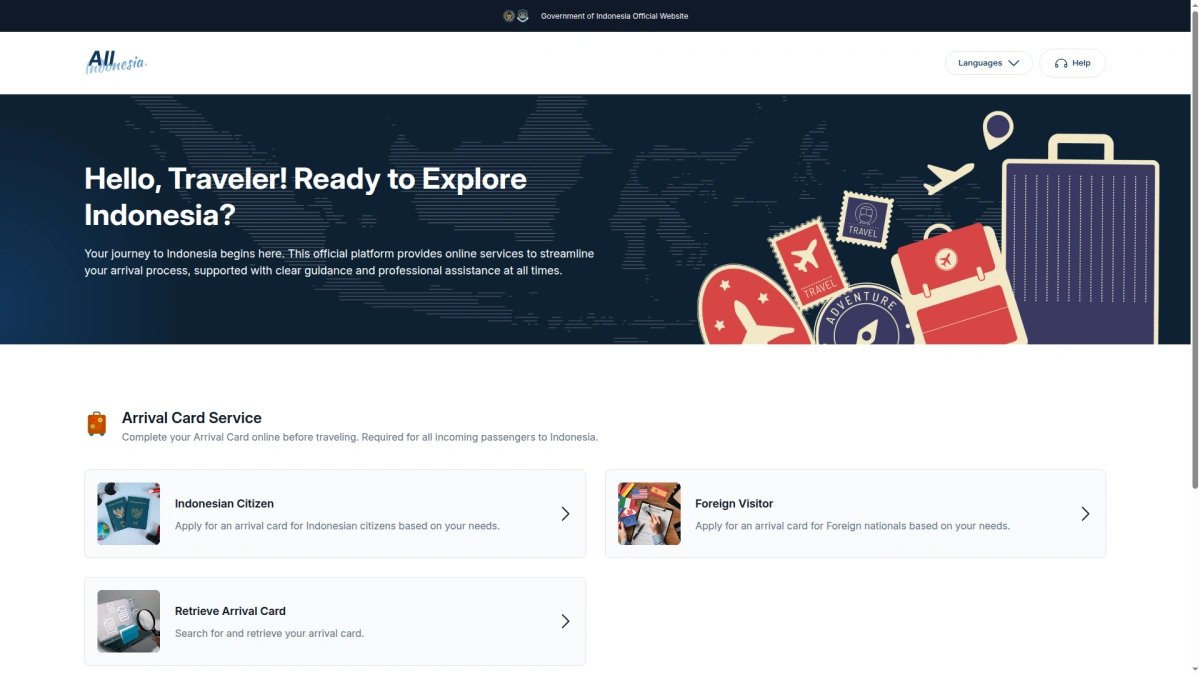
Open allindonesia.imigrasi.go.id and choose Foreign Visitor. On that browser tab, click the eVisaFlow extension icon in Chrome's toolbar to open its side panel. Choose Indonesia Arrival Card if it is not already selected.
Keep the official form as the active tab, with the extension beside it. Once the form is recognized, the side panel shows Auto Fill. Each click fills the current page; move to the next step with the official website's Next button.
eVisaFlow Southeast Asia fills saved passport, trip, stay and contact information on the All Indonesia official website when you run the extension.
2. Select your passport and complete the side panel first
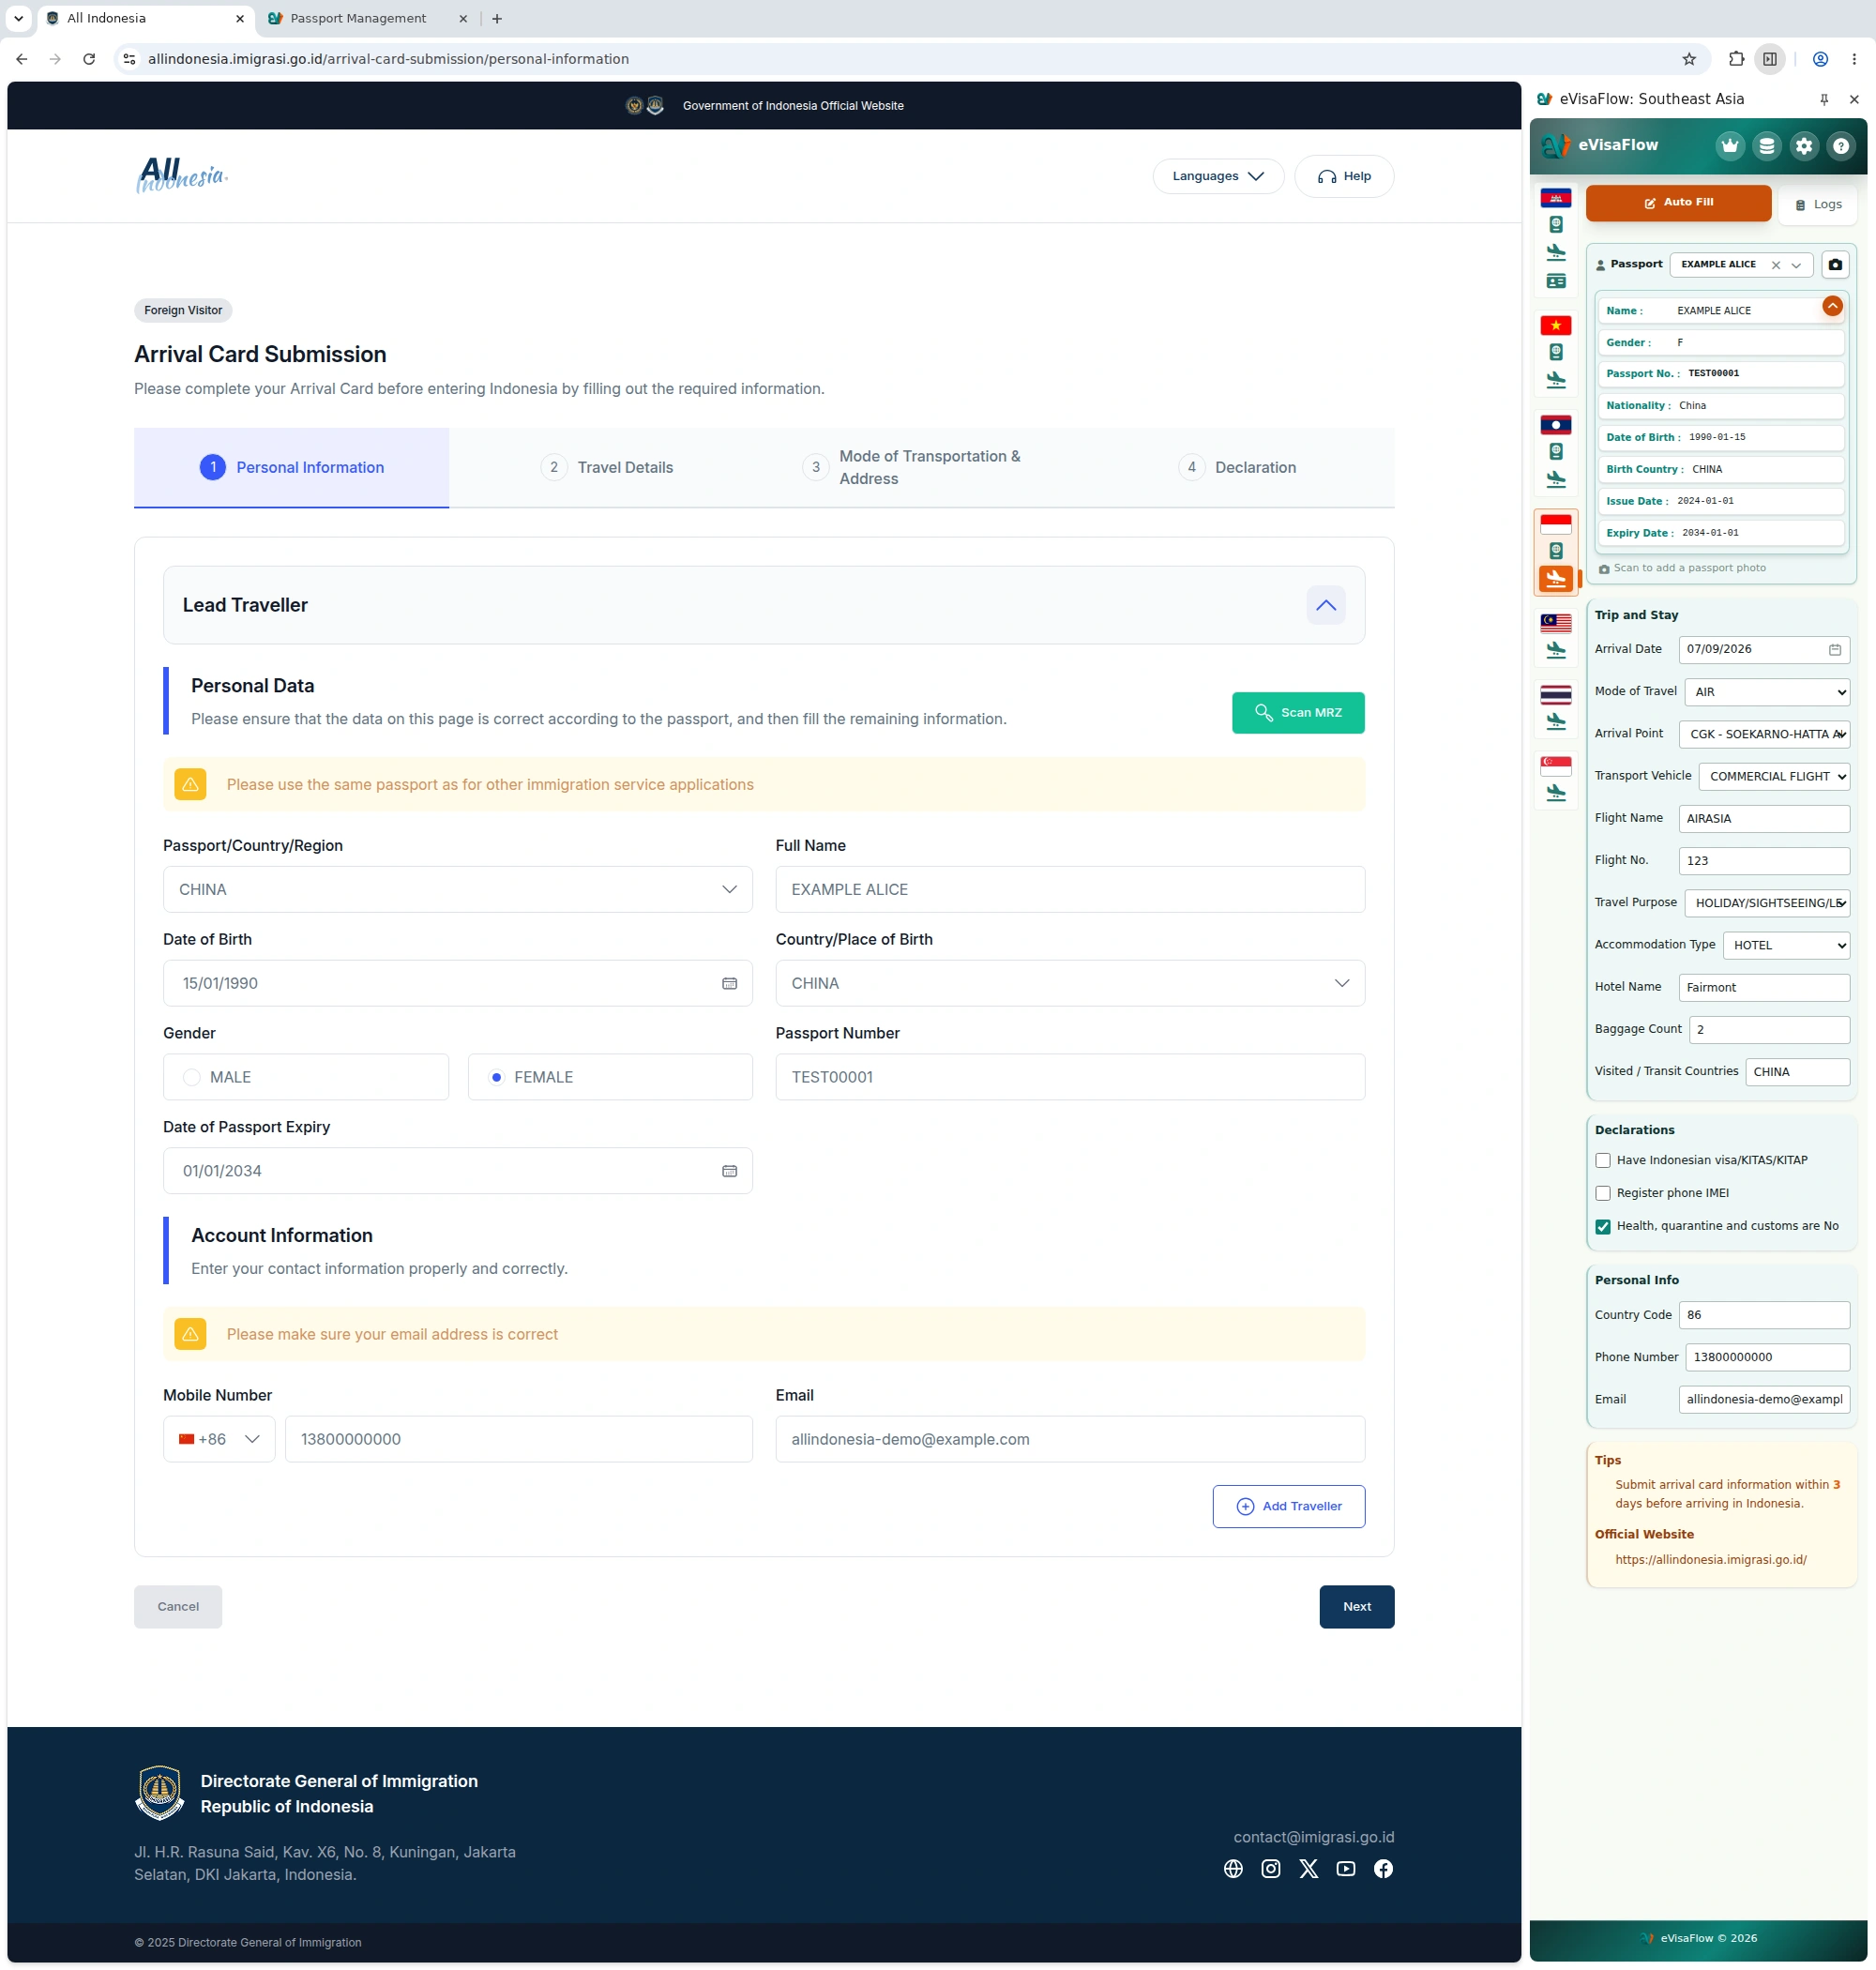
If you already have a saved passport, select it in Passport and check the displayed name and passport number. To save a passport first, open Data → Open Passport Management → Add Passport. Save the details, return to the official tab, and select that passport in the side panel.
This tutorial is for one traveler, so you do not need the Add Traveller button.
Complete the side panel before clicking Auto Fill. Grey examples inside an empty input are placeholders, not saved values.
| Side-panel field | What to enter or choose |
|---|---|
| Arrival Date | Your actual arrival date |
| Mode of Travel / Arrival Point | Your transport mode and actual arrival airport; this walkthrough uses AIR and CGK |
| Transport Vehicle | The flight type; this walkthrough uses COMMERCIAL FLIGHT |
| Flight Name / Flight No. | Your airline and flight-number digits; check the separate airline code on the official form |
| Travel Purpose | Your actual purpose of travel |
| Accommodation Type / Hotel Name | HOTEL and a hotel name that identifies your booking |
| Baggage Count | Your actual baggage count |
| Visited / Transit Countries | Countries matching the official question, including the relevant departure, transit and visited countries |
| Country Code / Phone Number / Email | Your telephone country code, telephone number and a working email address |
Also check the three declaration settings:
- Have Indonesian visa/KITAS/KITAP: set this according to the document you actually hold.
- Register phone IMEI: set this according to your situation and the official explanation.
- Health, quarantine and customs are No: use this only if all three corresponding answers really are No. If any answer is Yes, leave this setting off and answer the official questions individually.
3. Personal information: fill and compare with your passport
On the first official page, click Auto Fill in the side panel. The extension fills nationality, full name, date of birth, country of birth, gender, passport number, passport expiry, telephone country code, telephone number and email.
Check the name, dates and passport number against your passport. Use your own phone number and an email address you can access, not the sample details in the screenshots.
Click the website's Next button when the information is correct.
4. Travel details: check both dates and your visa answer
On the single-traveler travel-details page, click Auto Fill again.
The extension defaults to a 30-day stay, counting the arrival date as day one, when filling an empty departure field. For an arrival on September 7, 2026, the default departure date is October 6, 2026. Replace that date on the official form if it differs from your itinerary. This default does not establish your permitted stay.
The visa/KITAS/KITAP answer follows the side-panel setting. The screenshot shows No. If your answer is Yes, enter the document details requested on the official page.
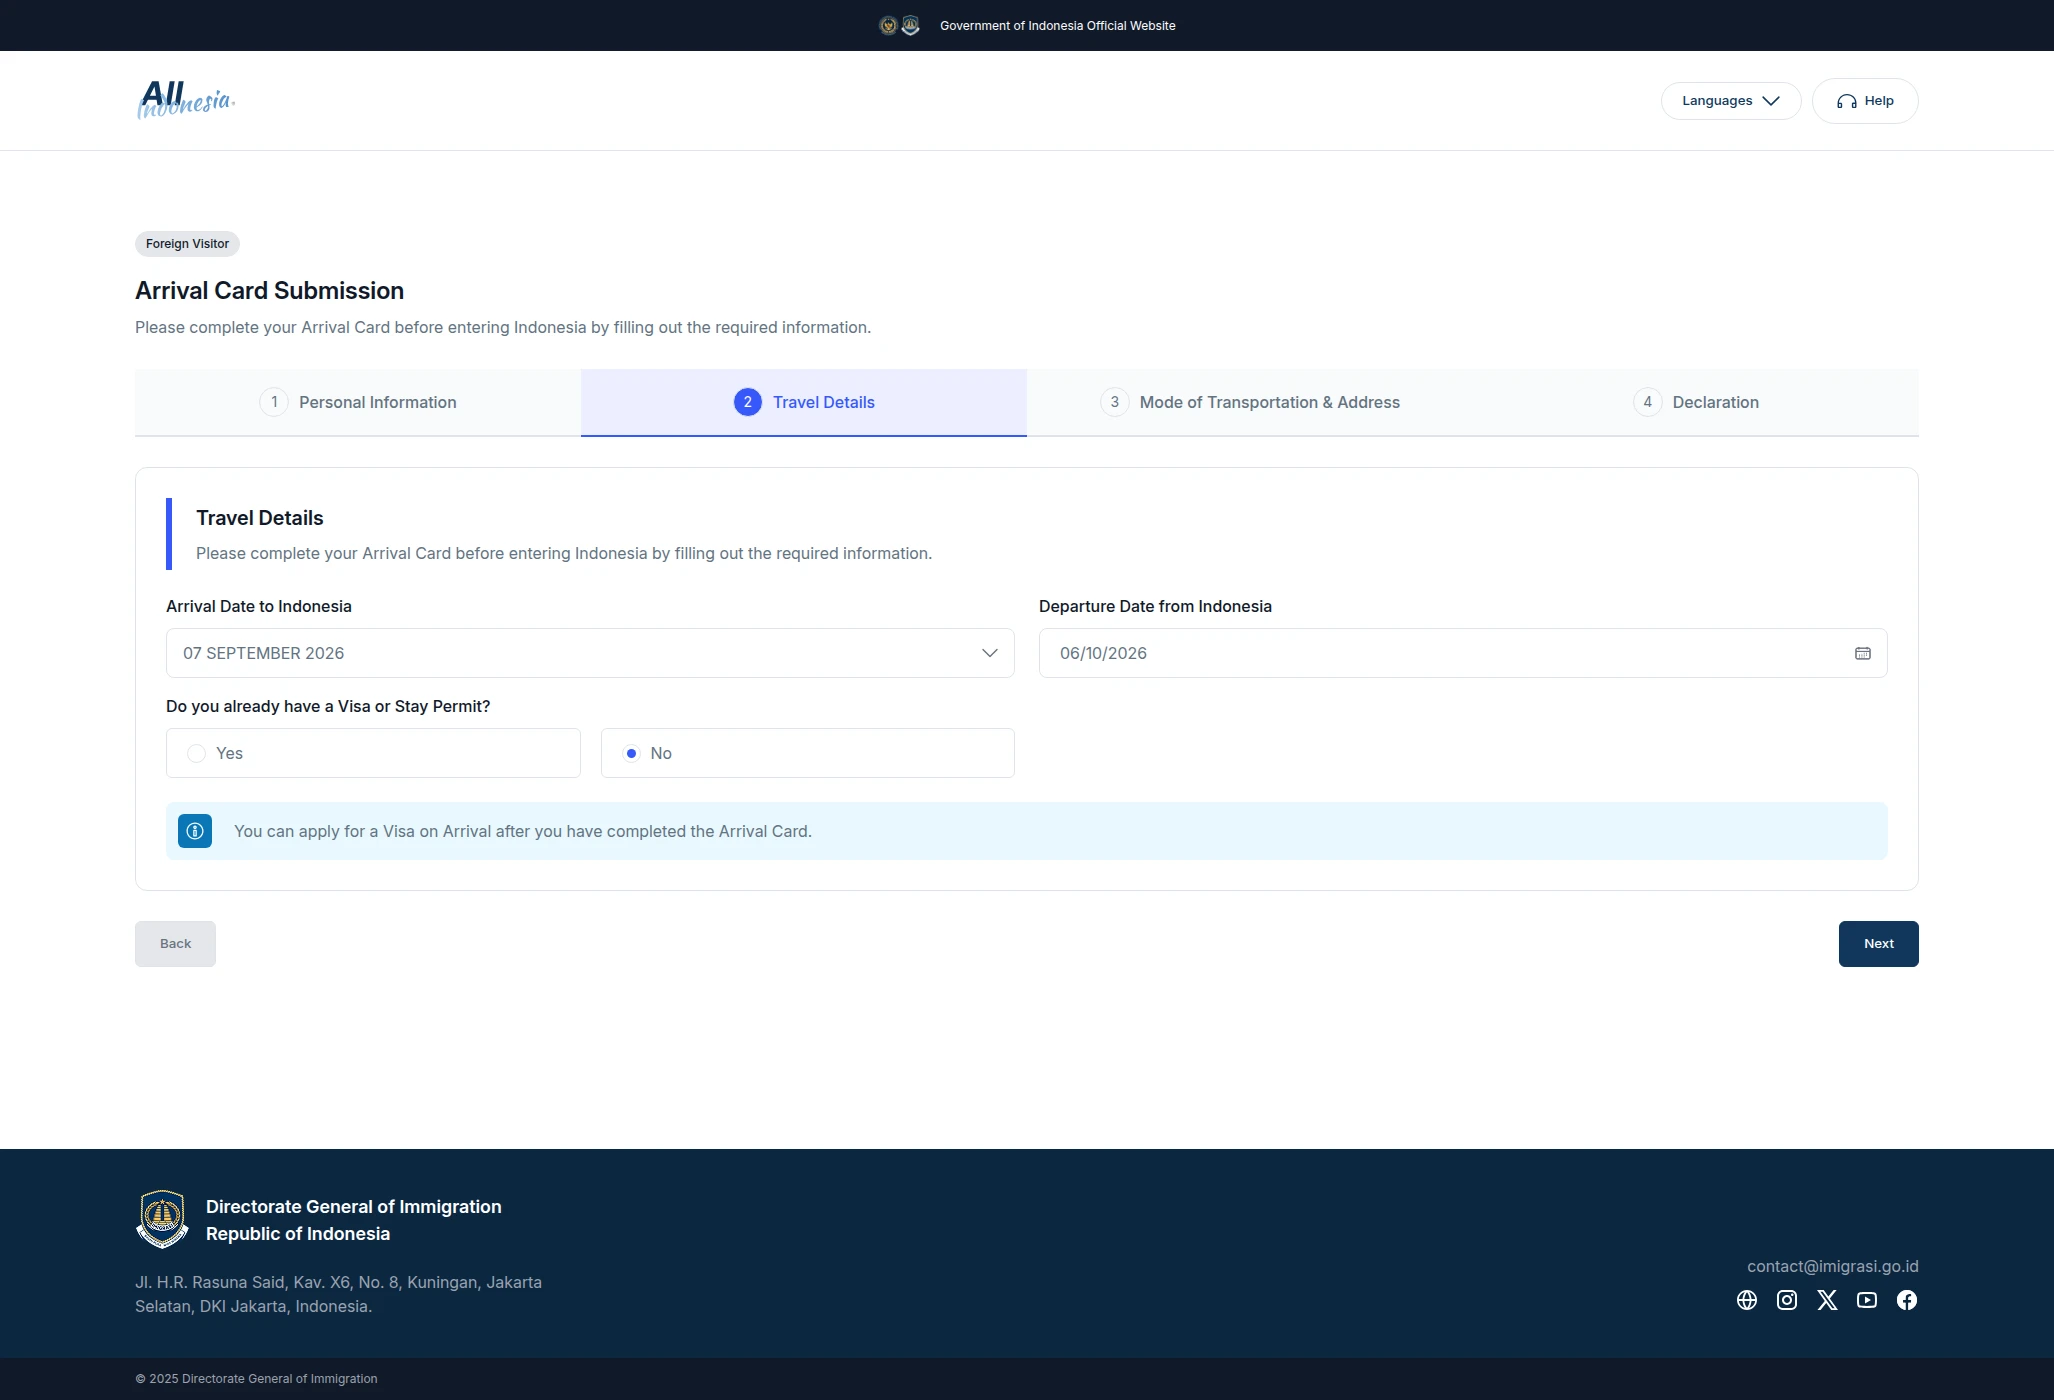
Check both dates and the selected answer, then click Next on the website.
5. Transport and accommodation: check the actual matches
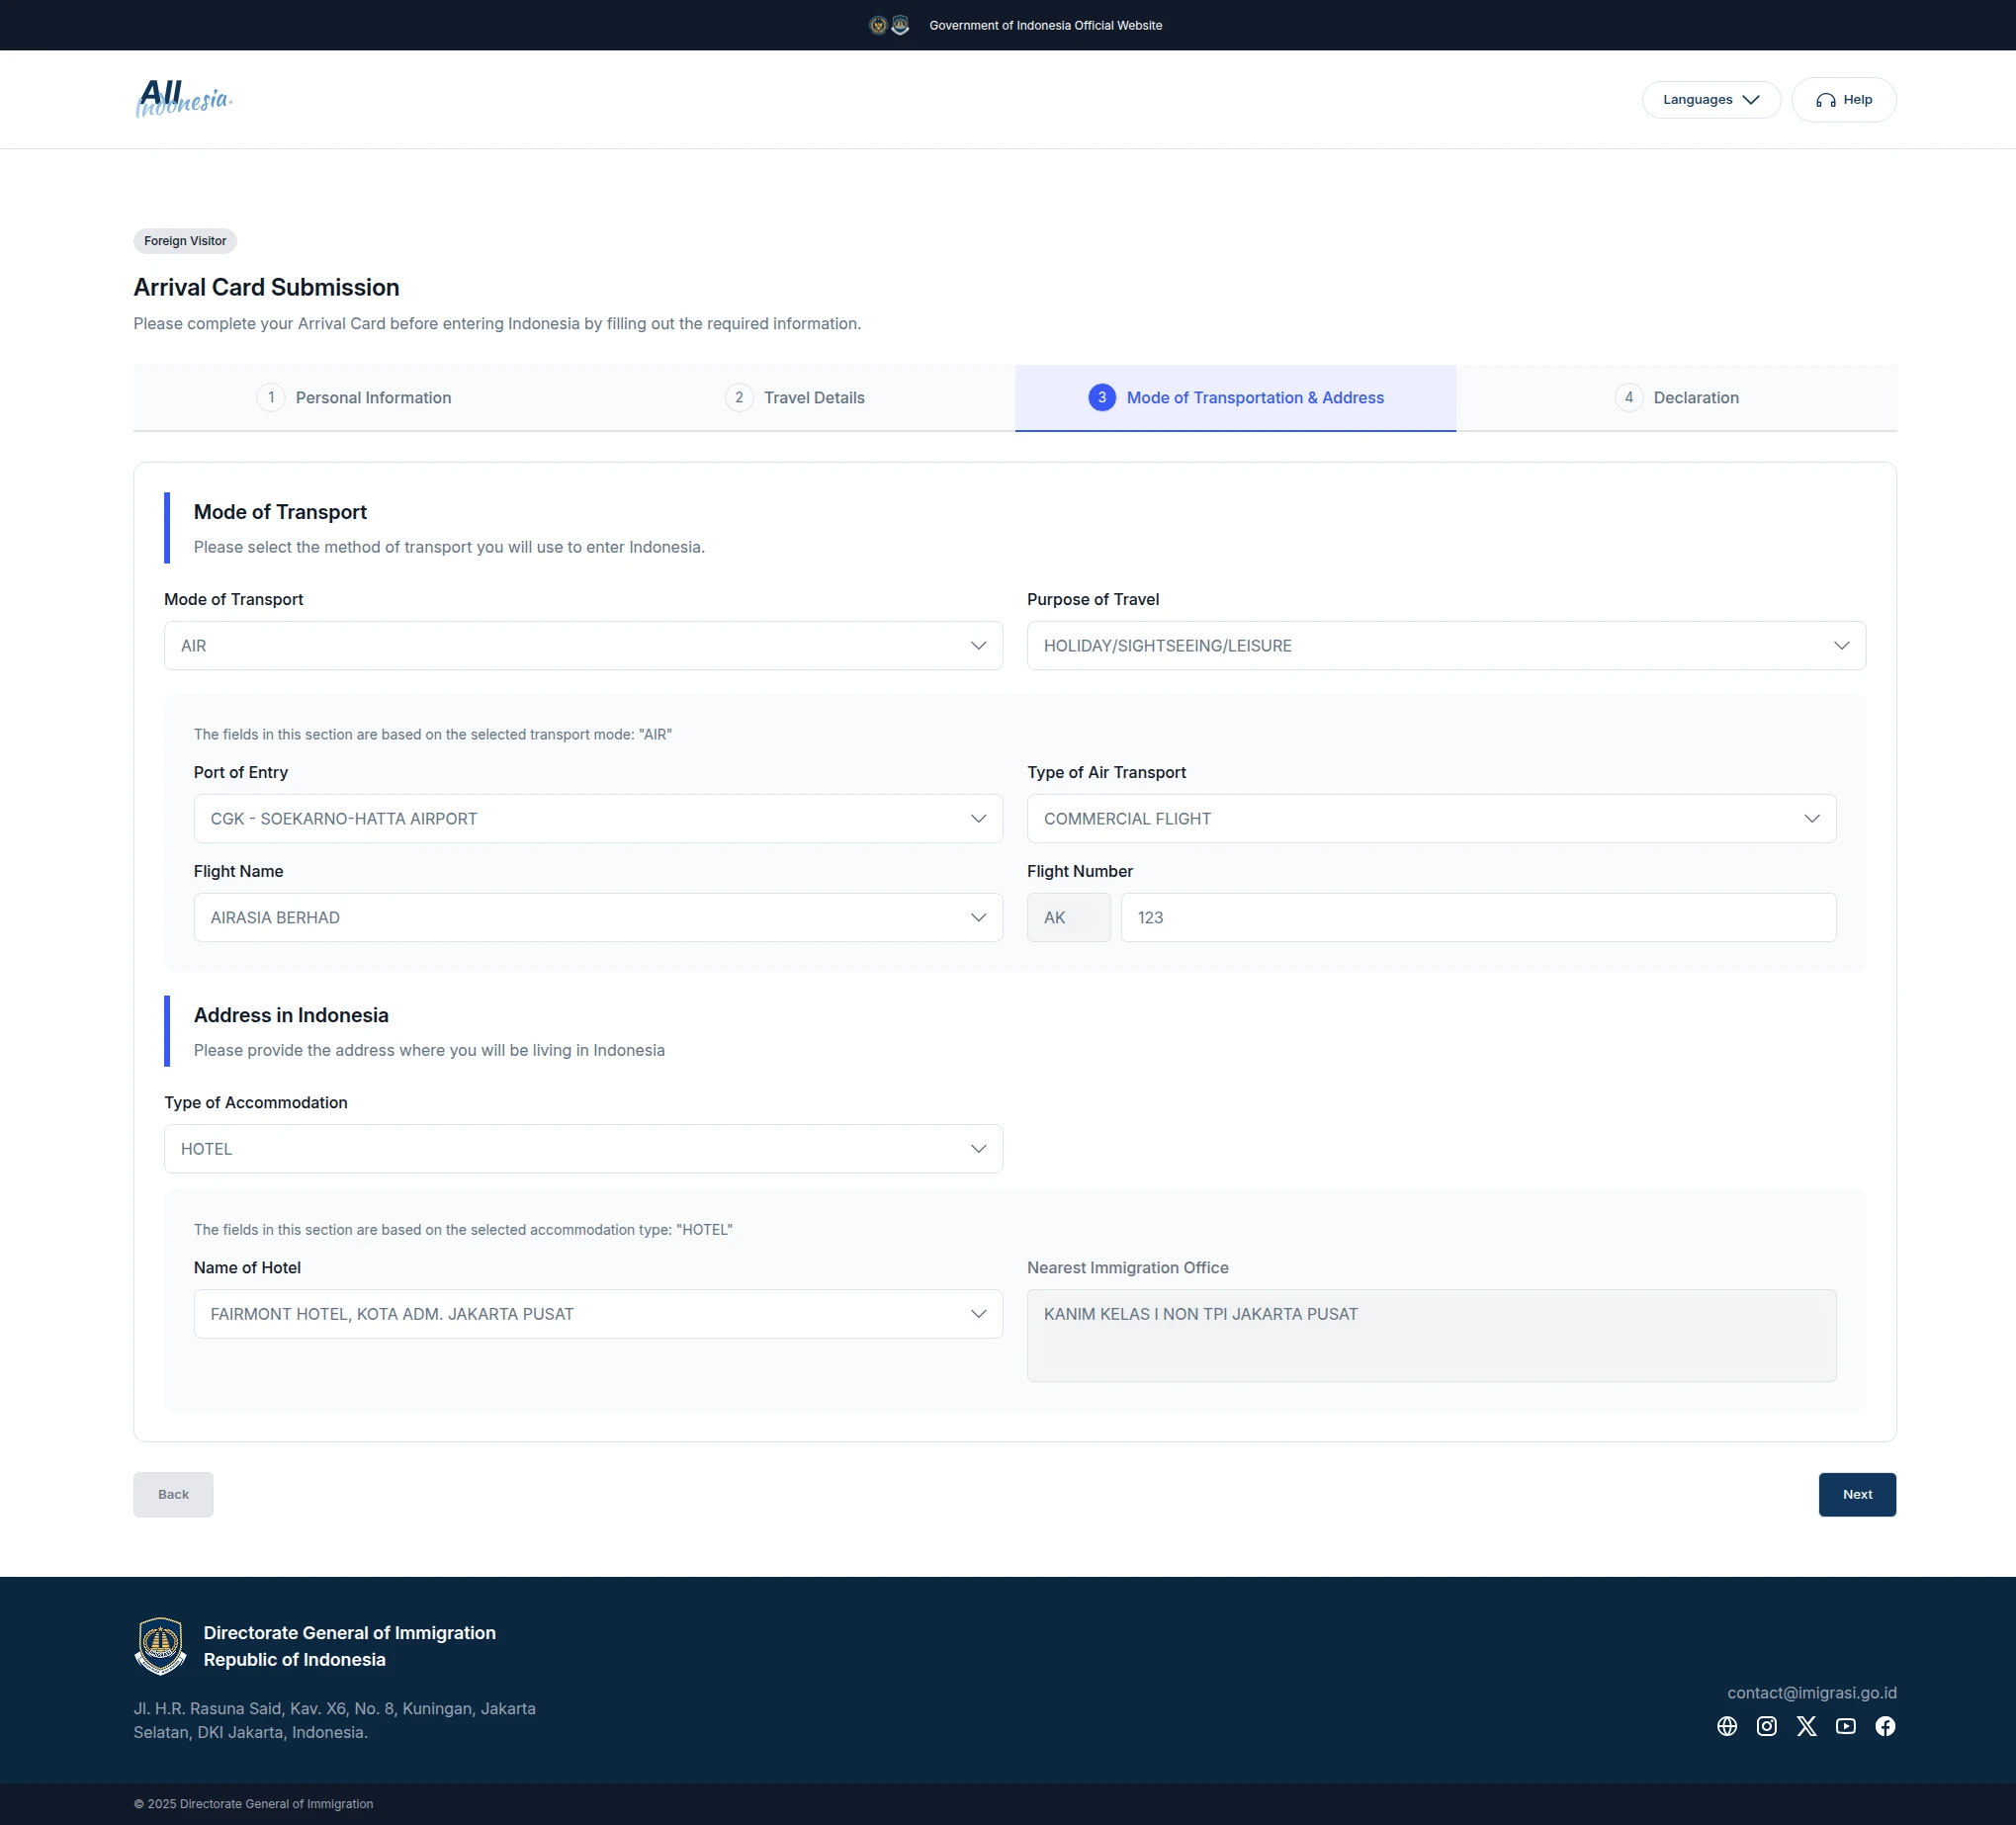
On the transport-and-address page, click Auto Fill. The extension uses your side-panel choices for transport mode, arrival point, flight type, airline, flight number, travel purpose, accommodation type and hotel.
Check these two selections against your flight and hotel bookings:
- Airline: the keyword
AIRASIAselectedAIRASIA BERHAD. The website displayed airline codeAKseparately from flight-number digits123. Match both the airline and the resulting flight number to your ticket. A brand name alone does not identify every airline operating under that brand. - Hotel: the keyword
FairmontselectedFAIRMONT HOTEL, KOTA ADM. JAKARTA PUSAT. Check the complete hotel name and city against your booking. The official website also populated the nearby immigration-office field.
If the selected airline or hotel does not match your booking, correct it on the official form before continuing.
6. Declarations: read the questions after filling
On the declaration page, click Auto Fill, then inspect each section:
- Health: check the symptoms question and all countries relevant to the time period stated on the page. The screenshot shows CHINA, taken from the side-panel value.
- Seat number: enter your seat information on the official form as requested; Auto Fill leaves this field blank.
- Quarantine and customs: read the official explanations and answer according to what you carry. The combined No setting selects No for health, quarantine and customs; use it only when all three answers are correct for you.
- Baggage: the form uses the count saved in the side panel: 2 in the screenshot.
- IMEI: check that the selected answer matches your circumstances and the official instructions.
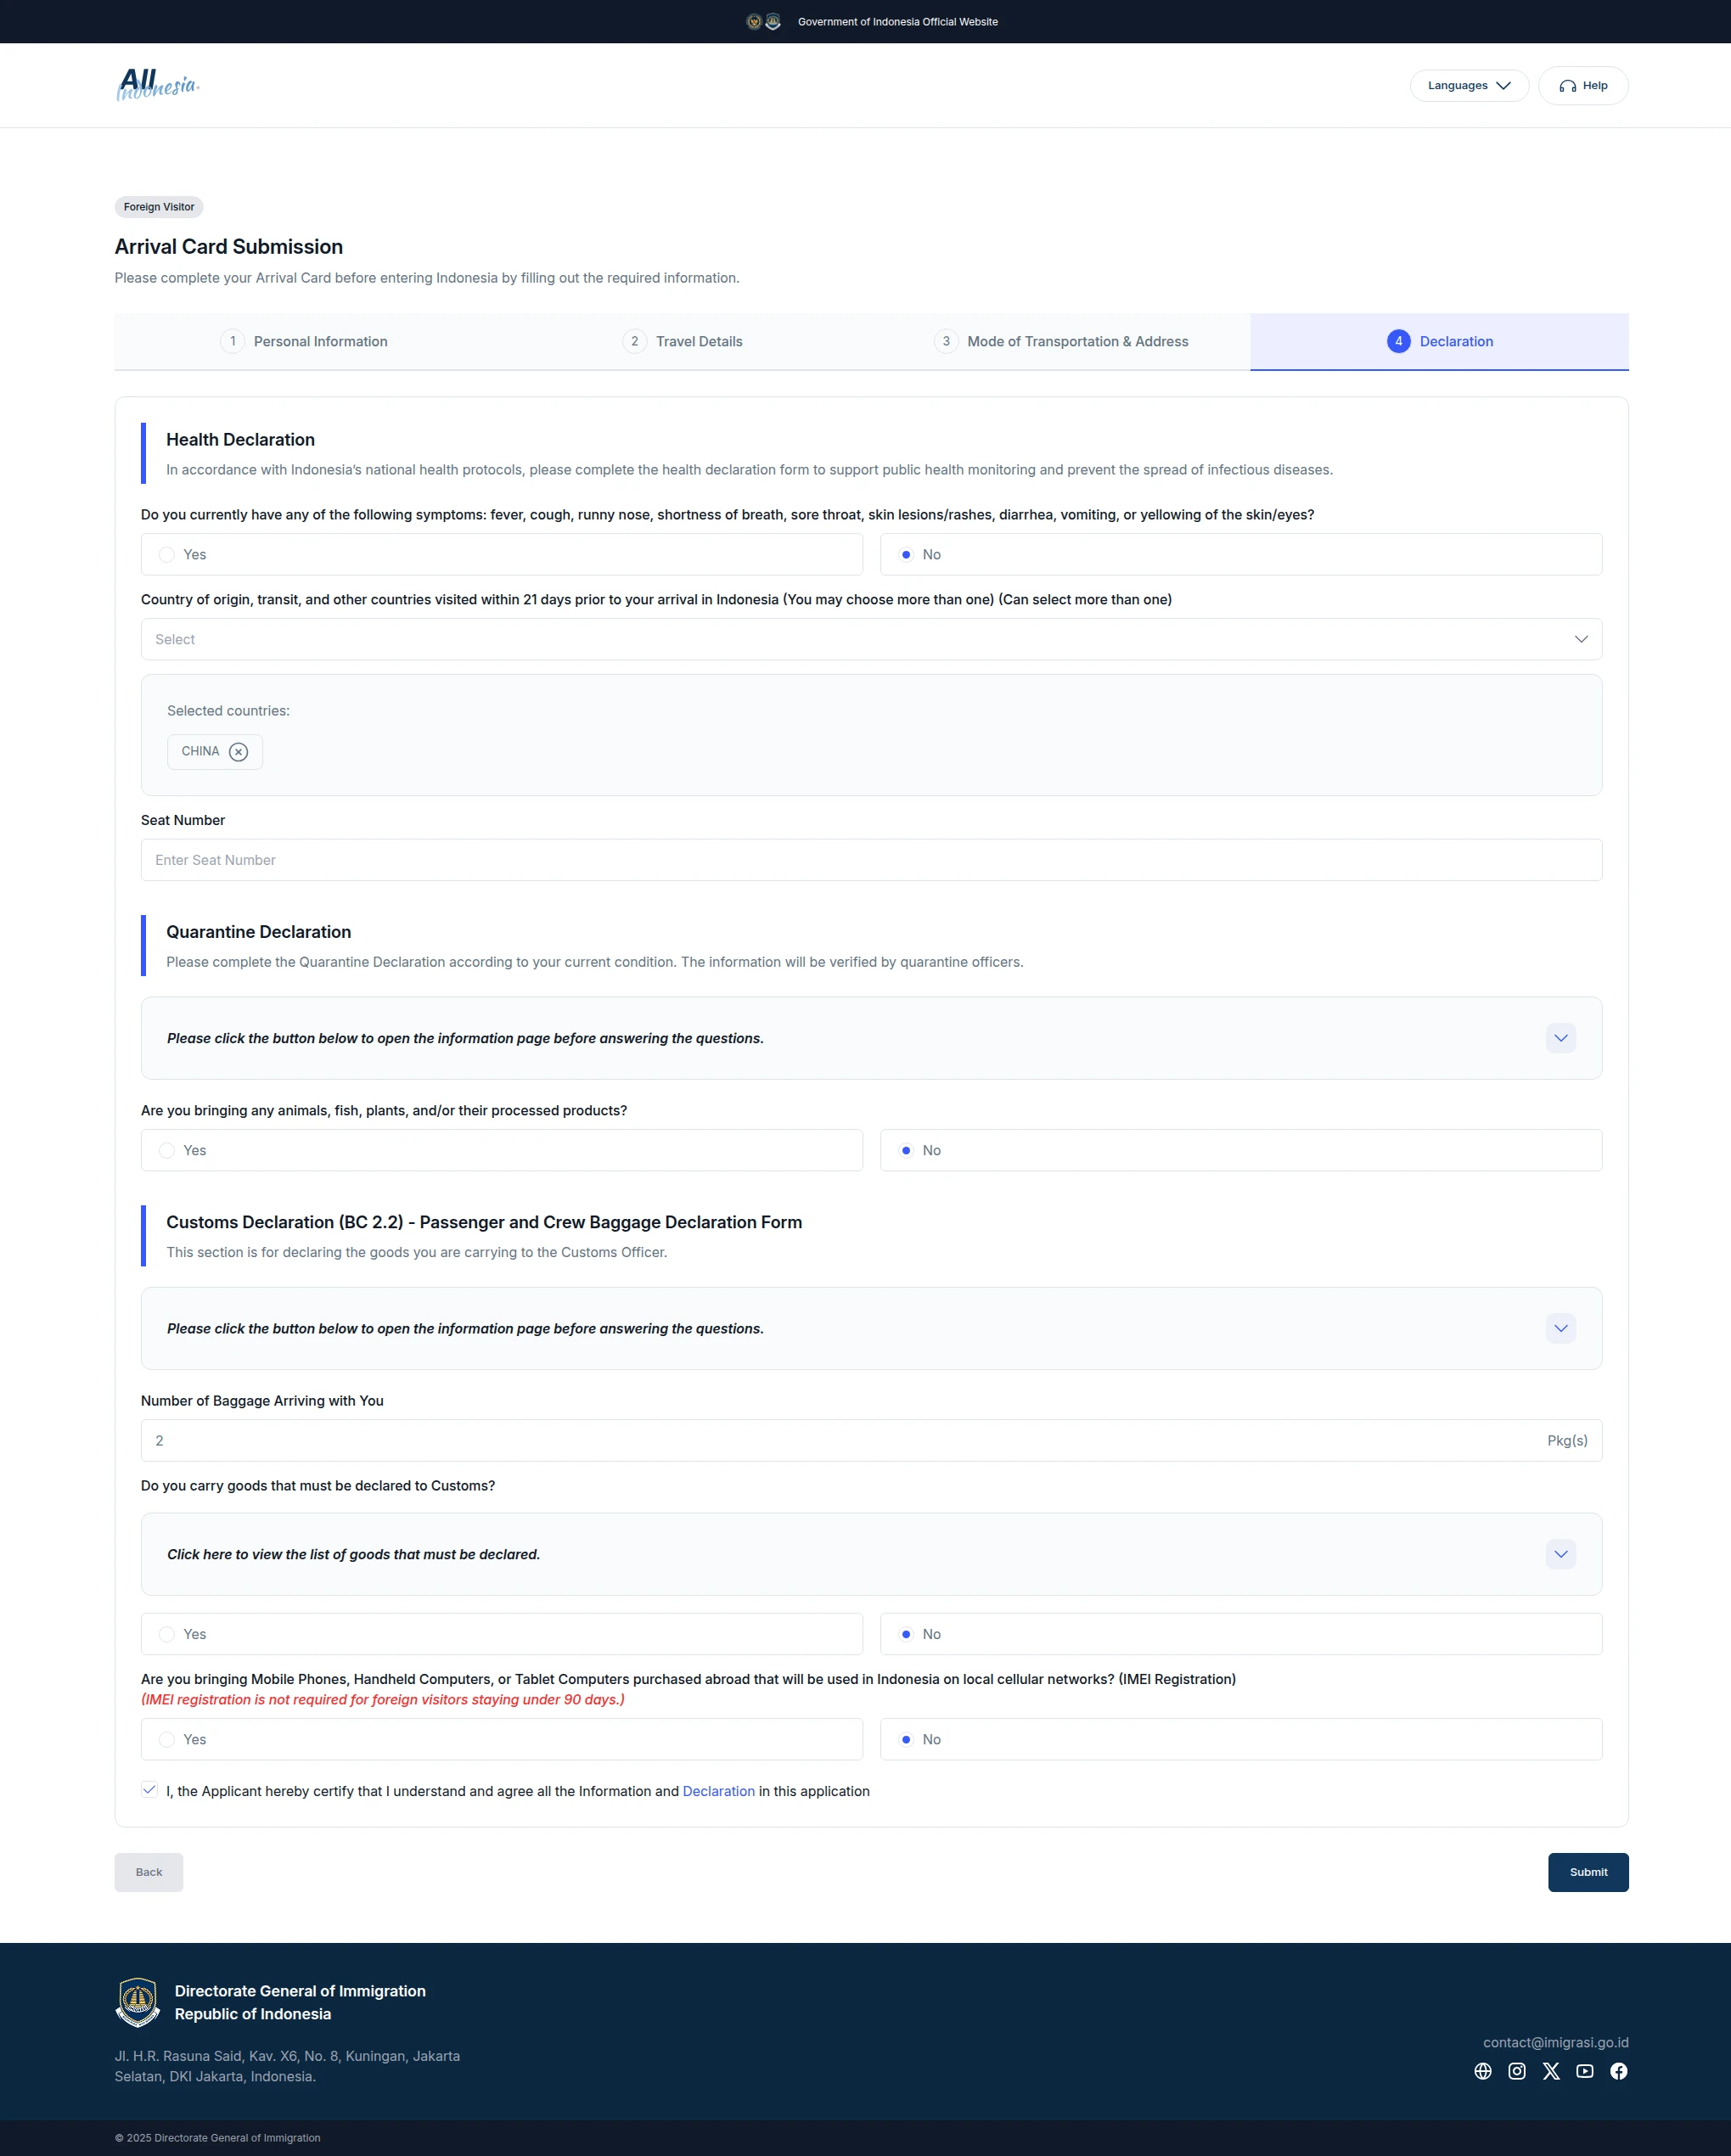
The extension also checks the agreement box at the bottom of the page. Read the statement and check the completed information yourself before submitting.
7. Finish on the official website
Once you have checked your answers, click Submit on the official declaration page and follow the website's instructions. If you click Auto Fill after making a manual correction, check that field again: the extension overwrites existing values by default.
References
eVisaFlow tool
Filling official eVisa and arrival forms?
eVisaFlow helps you reuse passport details and reduce repetitive typing when you complete supported Southeast Asia eVisa and arrival forms.
Related Reading
Guide
All Indonesia Arrival Declaration: QR Code, Customs Form, and When to Fill It
All Indonesia is the official arrival declaration. Submit it from three days before arrival or upon landing, save the QR code, and keep it separate from e-VOA.
Guide
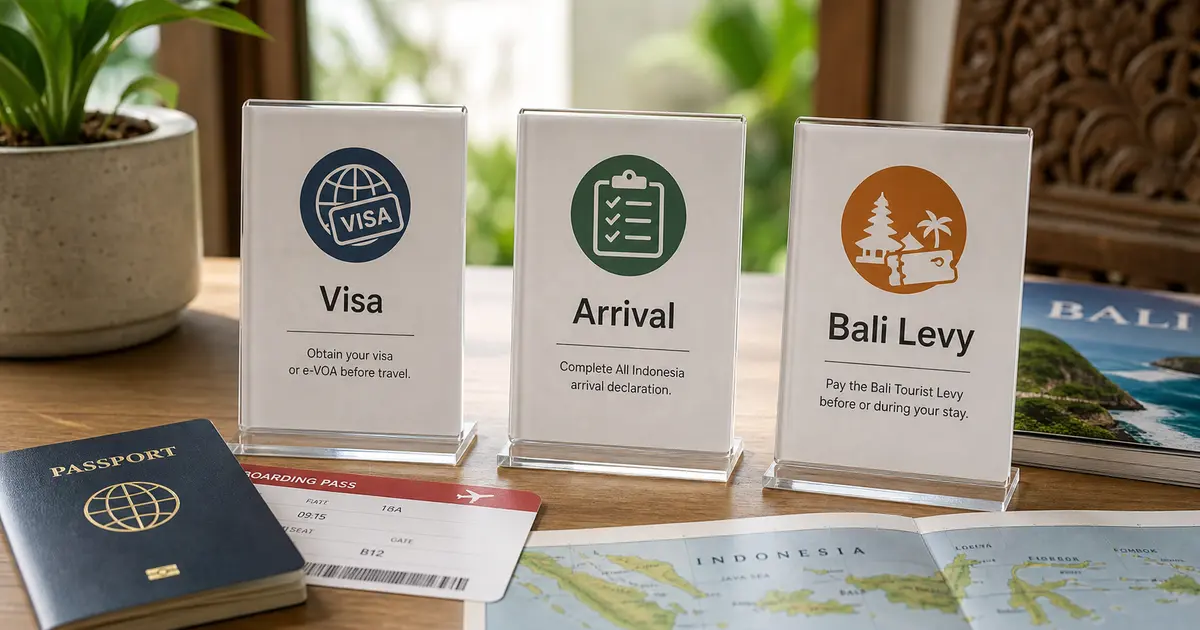
Bali Tourist Levy vs Indonesia e-VOA vs Arrival Declaration
Indonesia e-VOA, All Indonesia arrival declaration, and Bali Tourist Levy are separate steps. Learn which one is a visa, a declaration, or Bali-only fee.
Guide
Indonesia C1 Tourist Visa: Email Registration, Documents, and Application Steps
Apply for Indonesia's C1 tourist visa: email registration, passport and bank-statement documents, form steps, review, fees, and processing time.
Guide
Bali Tourist Levy: How to Pay, Official Website, and Exemptions
Pay the Bali Tourist Levy through the official Love Bali system: check the IDR 150,000 fee, exemptions, payment methods, and QR voucher.